(Updated May 30, 2023)
Azure AD cross-tenant synchronization is now released for general availability. Cross-tenant sync enables the automatic provisioning of accounts from a source tenant to a target tenant as B2B users. Invitations are not required, and users are able to access applications once provisioning is complete. This feature is handy for mergers and other multi-tenant scenarios where many users from other tenants need to access apps on a target tenant. For example, in the early phase after the merger, it’s simple to grant access for users from the other tenant to access, for example, intranet, HR-system, document centers, etc. If requirements are just for accessing Teams channels, I would recommend using Teams shared channels. Although the feature supports the synchronization of accounts between any organization, it’s recommended to use the feature for internal company purposes.
Cross-tenant sync configuration
Enabling cross-tenant sync requires configuring cross-tenant access settings in both tenants. It is possible to sync multiple tenants to a single target tenant.
Target tenant configuration
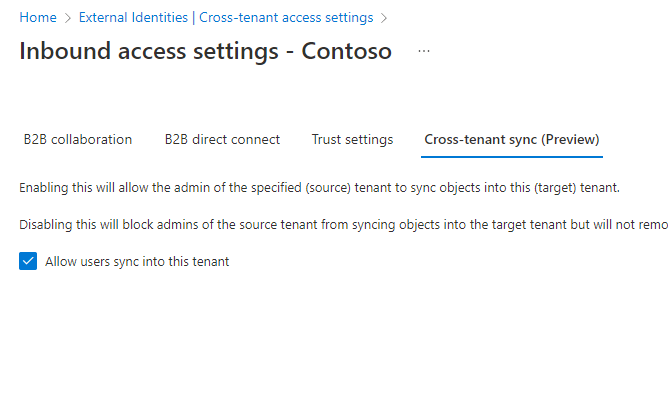
Inbound access on the cross-tenant access settings for the source tenant needs to be enabled on a target tenant.
- Open the cross-tenant access settings blade from Microsoft Entra or Azure Active Directory portal.
- Add new organization and open inbound access settings
- On the Cross-tenant sync, tab enable Allow users sync to this tenant
- On the Trust settings tab enable Suppress consent prompts…


This configuration enables cross-tenant sync only for the specified tenant. And when multifactor authentication is used in both tenants, I would recommend enabling Trust multifactor authentication from Azure AD tenants setting so a user from an external tenant doesn’t need to register multifactor authentication again as a guest user since it’s trusted from the user’s home tenant.
Source tenant configuration
On the source tenant, the outbound access settings need to be set for the target tenant.
- Open the cross-tenant access settings blade and add the target tenant
- Open outbound access settings
- On the Trust settings tab, enable Suppress consent prompts… checkbox

Provisioning configuration
Provisioning configuration is done in the source tenant in the Cross-tenant synchronization blade.
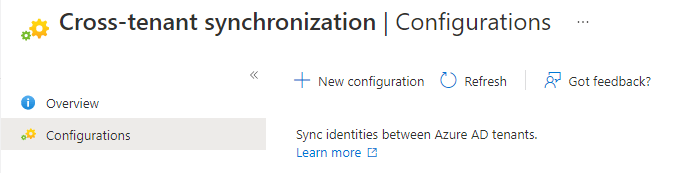
Once a new configuration is created, provisioning settings and scope assignments can be accessed. On the Users and groups setting the individual users and group members which should be provisioned are defined.

On the provisioning setting, first, the connection needs to be tested. The tenant Id of the target tenant is required in this phase. Once the connection is successfully tested, provisioning settings can be defined. If the connection test fails, the configuration should be checked in both tenants.

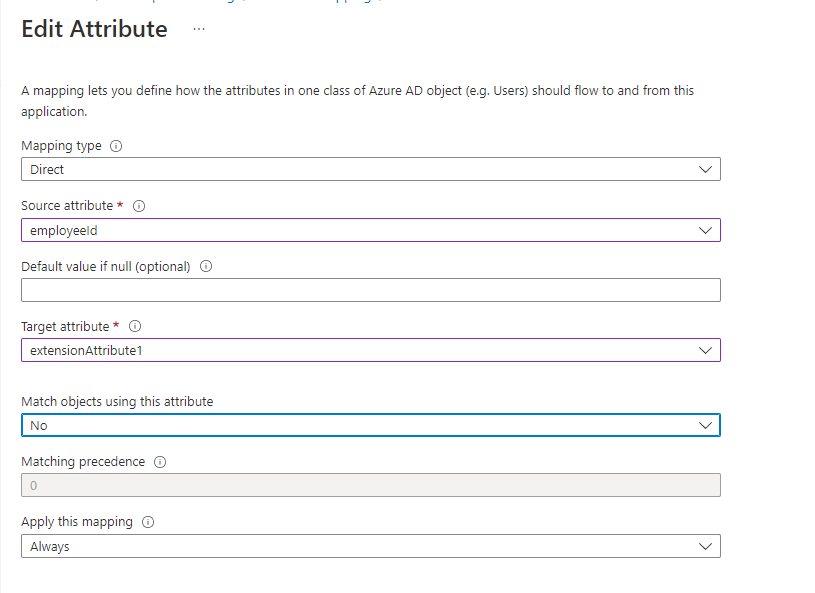
Attribute mappings
On the attribute mappings, admins can define which attributes are provisioned to the target tenant. Some attributes can be removed and new ones added based on Azure AD schema.

It’s also possible to manage attribute values.
- Direct: attribute value is copied as it
- Constant: Constant value for the attribute for all provisioned users
- Expressions: Combining attribute and text using expression syntax. For example, adding company initials to users’ display names.
- None: Empty
Attributes can be cross-mapped, for example adding values to extension attributes.
On the provisioning settings part the email address for failure notifications, deletion threshold and scope for assigned or all can be set.

Once the configuration is complete, the Provisioning status can be switched to On.
Scoping Filters
Scoping filters can be used to include or exclude users based on their attribute values. For example, including users from a specific department. Scoping filters are an addition to user/group scope.

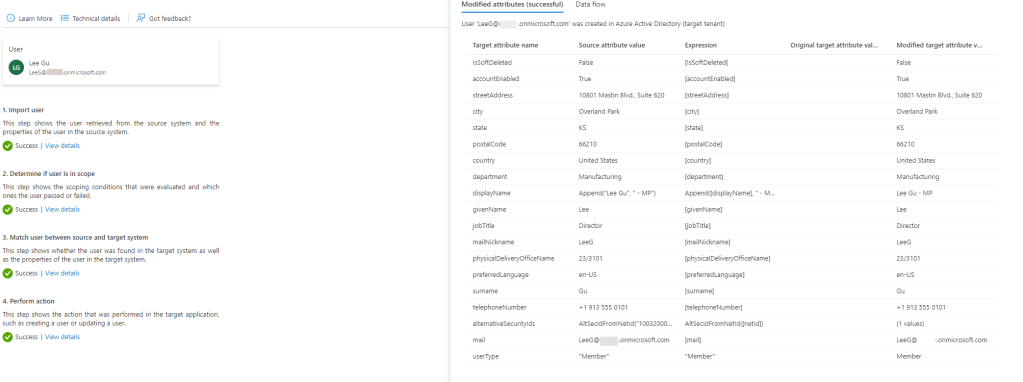
Testing the provisioning
Provision on demand can be used to test is the configuration and attribute mappings are working correctly.
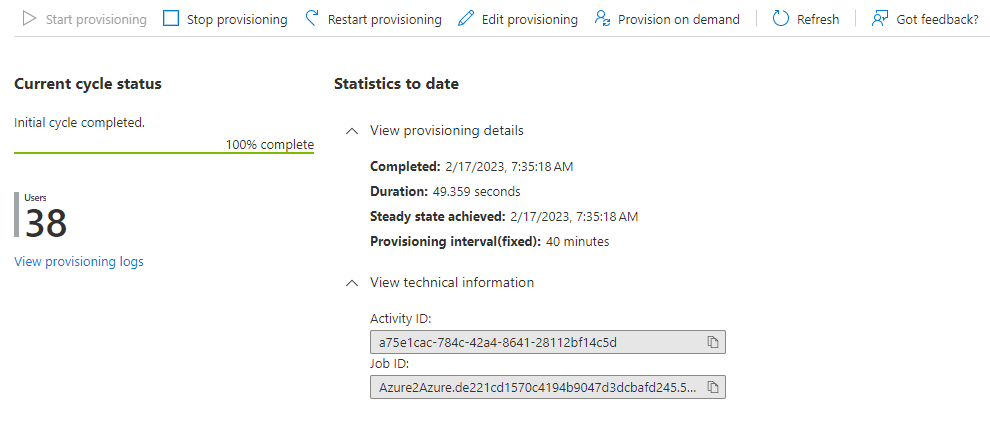
Provisioning status
From the provisioning status, it is possible to start/stop provisioning, and restart.
Deleting the synchronization configuration
Synchronization configuration is deleted from Enterprise applications, so it’s important to name the synchronization configuration clearly.
Limitations
- Cross-tenant synchronization only synchronized user accounts, not groups, devices or contacts.
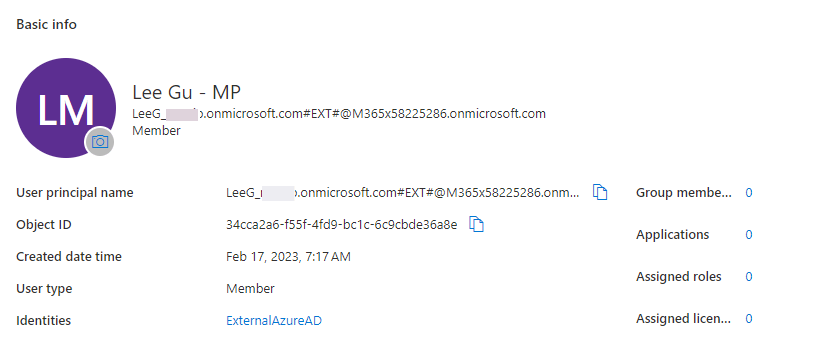
- Photos are not synchronized between tenants.
- Azure Virtual Desktop is not supported, since it doesn’t support B2B guest users
- Access to PowerBI is not supported
More on Microsoft Learn: https://learn.microsoft.com/en-us/azure/active-directory/app-provisioning/known-issues
Afterword
Cross-tenant sync is a great feature for situations where cross-tenant collaboration needs to be set up quickly. Configuration is simple but requires of course planning the attributes and scopes on the source tenant, and where and how provisioned users have access to the target tenant. Good attribute planning enables the usage of dynamic groups for providing access to resources, such as intranet portals, document repositories, and apps. Sync can be an option for early-stage access after a merger even if accounts are migrated to the target tenant later. This gives more time for planning the actual migration and provides access to needed resources quickly. And synchronized users can be automatically deleted from the target tenant using sync settings and scoping.
More on cross-tenant sync: https://learn.microsoft.com/en-us/azure/active-directory/multi-tenant-organizations/cross-tenant-synchronization-overview
Discover more from Enabling the Future of Work with Matti
Subscribe to get the latest posts sent to your email.

How can users be synchronized to target tenants as external guests and not as external members (default).
LikeLike
Sorry for my late answer.
You can change the userType on the attribute mapping from Member to Guest.
LikeLike
Interesting article, It worked in my test environment as expected except deletion of User from the source tenant doesn’t delete in the target tenant. Is there any specific settings which I am missing
LikeLike
This was a very useful article. Thank you for sharing. Do you know if there is anything preventing an external member added this way that would prevent it from working in a Teams call queue? I have successfully done a sync and it added the user to the other tenant. I assigned the Teams Essential with Phone license and the phone number. I can add them to a call queue just fine, but they never ring. I also noticed the total agent count doesn’t increase when I add an external member to it. I even ran the powershell command to check the queue and I see them under users, but not under Agents. There seems to be something preventing it from joining the Call queue, but not sure what. I can recreate this with multiple users. Could be a bug?
LikeLike