There are some Microsoft Teams features which cannot be configured or clearly seen on Microsoft Teams & Skype for Business Admin Center, so here are some PowerShell scripts to manage and activate Teams features like
- Enable Message Translation
- Manage Teams-only mode
- Manage live event policies
Prerequisites
Skype for Business Online Connector module is required for operating with Teams settings. You can check, if you have it already installed with this PowerShell command
Get-Module -ListAvailable | where-object {$_.Name -eq "SkypeOnlineConnector"}
Command will return something like this, if module is available:

If command returns nothing, you need to download and install Skype for Business Online Connector module.
Opening a management session
First you need to open a management session, it requires just couple of PowerShell commands.
Import-Module SkypeOnlineConnector
$session = New-CsOnlineSession
Import-PSSession $session
Once complete, you can start activating Teams features and managing policies.
Message translation
Message translation allow users to translate chat message on Teams conversations.
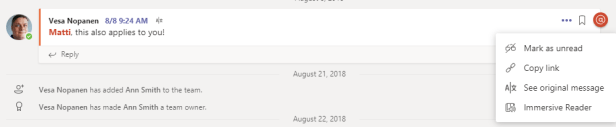
Message translation can be activated with single policy setting.
Set-CsTeamsMessagingPolicy -Identity Global -AllowUserTranslation $true
Identity parameter value Global activates message translation to all users.
Migrating users to Teams-only mode
Teams only mode is one option for migrating from Skype for Business to Teams. On Teams only mode users are utilizing Teams on day-to-day communications and collaboration. Skype for Business is still, at least for now, required for attending Skype for Business meetings. Chats and calls support only basic functionalities between Skype for Business and Teams.
For activating Teams-only mode to a single user, you need to run two PowerShell commands to update policies.
Grant-CsTeamsUpgradePolicy -PolicyName UpgradeToTeams -Identity $SipAddress
Grant-CsTeamsInteropPolicy -PolicyName DisallowOverrideCallingTeamsChatTeams
-Identity $SipAddress
If you want to update all users in the organization, just leave -Identity parameter out.
After commands are run, users Skype for Business client will tell user to start using Teams. For me this happened in 1-2 minutes.

More information about different migration options for Skype for Business and Teams can be found here: https://docs.microsoft.com/en-us/microsoftteams/upgrade-and-coexistence-of-skypeforbusiness-and-teams
Managing Teams Live Event Policies
By default Teams has a Global policy for live events, which affects to all users in the organization.
You check all organization’s policies with
Get-CsTeamsMeetingBroadcastPolicy
It should at least return a Global policy.
You can create new live event policies from Microsoft Teams and Skype for Business Admin Center or create the policy with PowerShell.
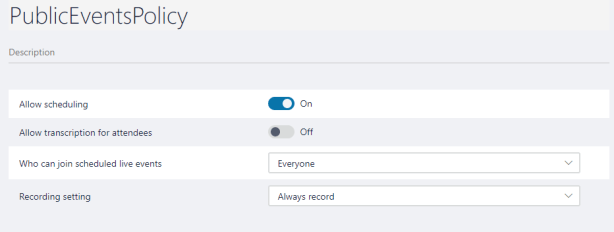
New-CsTeamsMeetingBroadcastPolicy -Identity "PublicEventsPolicy" -BroadcastAttendeeVisibilityMode Everyone
Command creates a new policy name “PublicEventPolicy” with settings below
To get all users who have custom policy applied, for this example policy is named “PublicEventsPolicy” and user’s DisplayName and UserPrincipalName are returned.
Get-CsOnlineUser | Where-Object {$_.TeamsMeetingBroadcastPolicy -eq "PublicEventsPolicy"} |select DisplayName, UserPrincipalName| out-gridview
And to get a nice list of all users sorted by custom live event broadcast policy.
Get-CsOnlineUser | Where-Object {$_.TeamsMeetingBroadcastPolicy -ne $null} |Sort-Object -Property TeamsMeetingBroadcastPolicy | select DisplayName, TeamsMeetingBroadcastPolicy | Out-GridView
Discover more from Enabling the Future of Work with Matti
Subscribe to get the latest posts sent to your email.

Hi Matti ..This is a great article from the knowledge perspective. However i am facing one issue when i try to do this. I have SkypeOnlineConnector Module installed on my machine , still i do not see any commandlets with Grant-Cs or Get-Cs etc. However i do get New-CsOnlineSession and can connect to my tenant with that. What can be the issue. Is there any other module which needs to be imported or installed. I have included command Import-Module .pds as well. Please advise
LikeLike
Hi Ritest
It was quite long ago when I wrote this blog. You need to create a new session and import it first, after that you can use all the cmdlets.
LikeLike
I’m not sure where you’re getting your information, but good topic. I needs to spend some time learning much more or understanding more. Thanks for excellent information I was looking for this info for my mission.|
LikeLike