Securing the most sensitive and business-critical information is a truly important factor to consider when planning information management. Regulations, research, business reporting, and sensitive personal information add requirements for data handling. At the same time constantly changing threat landscape, phishing campaigns, and attacks increase the need for security hardening. But collaboration needs to be fluent, and access to data as easy as possible. Usually different content requires a different level of hardening and considerations for security.
In this blog post, I will walk through a scenario to increase security for specific content by allowing just phishing-resistant authentication methods. The scenario will introduce using recently released conditional access authentication strengths combined with authentication context and sensitivity labels.
Step 1: Setting Up a New Authentication Strength
Authentication strength allows administrators to define strong authentication methods for specific conditional access policies. Authentication strengths can be found on the Authentication Methods blade. Microsoft has defined three built-in of authentication strengths:
- Multi-factor authentication, which includes all available methods for strong authentication
- Passwordless MFA, which includes Windows Hello for Business, FIDO2, Certificate, and Microsoft Authenticator
- Phishing-resistant MFA, which includes Windows Hello for Business, FIDO2, and Certificate-based authentication
Built-in strengths cannot be modified, but administrators can create custom strengths.
For this scenario, let’s create a new authentication strength for business-critical information and just enable FIDO2 as a method.
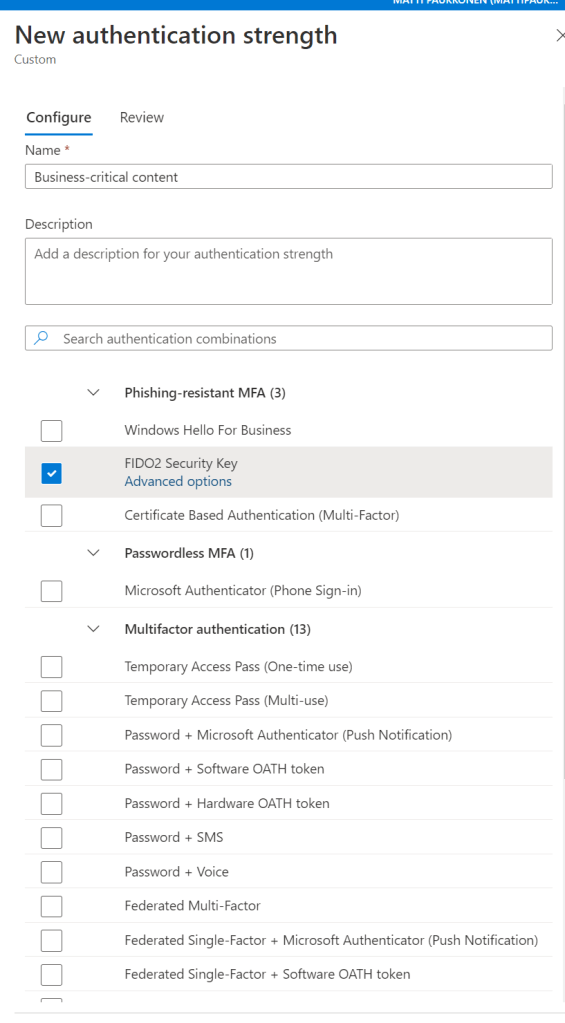
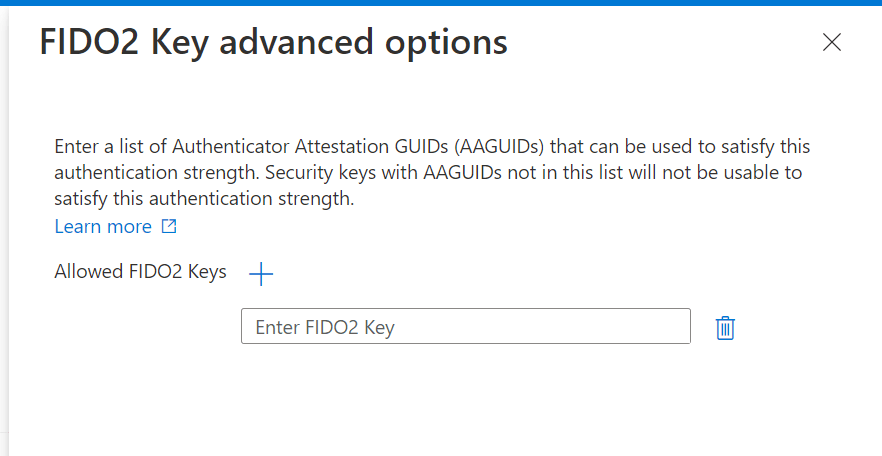
In advanced FIDO2 options, administrators can list allowed FIDO2 keys for authentication.
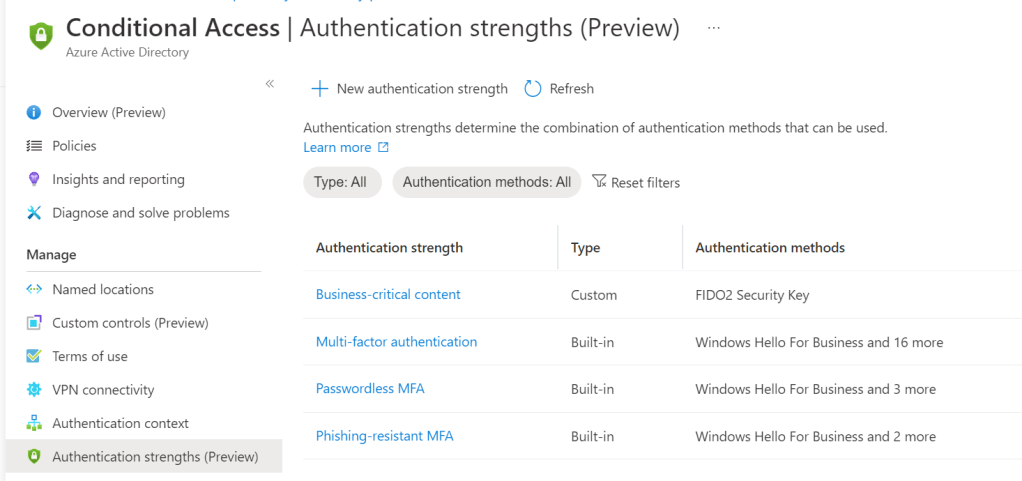
When created, new authentication strength is available.
Learn more about authentication strengths: https://learn.microsoft.com/en-us/azure/active-directory/authentication/concept-authentication-strengths
Step 2: Setting Up Authentication Context
Next, we need to set up a new authentication context, which can be then used in a conditional access policy. Authentication context can be used to increase security in applications. Authentication context support custom applications, Microsoft 365 applications like SharePoint, and application protected by Defender for Cloud Apps.
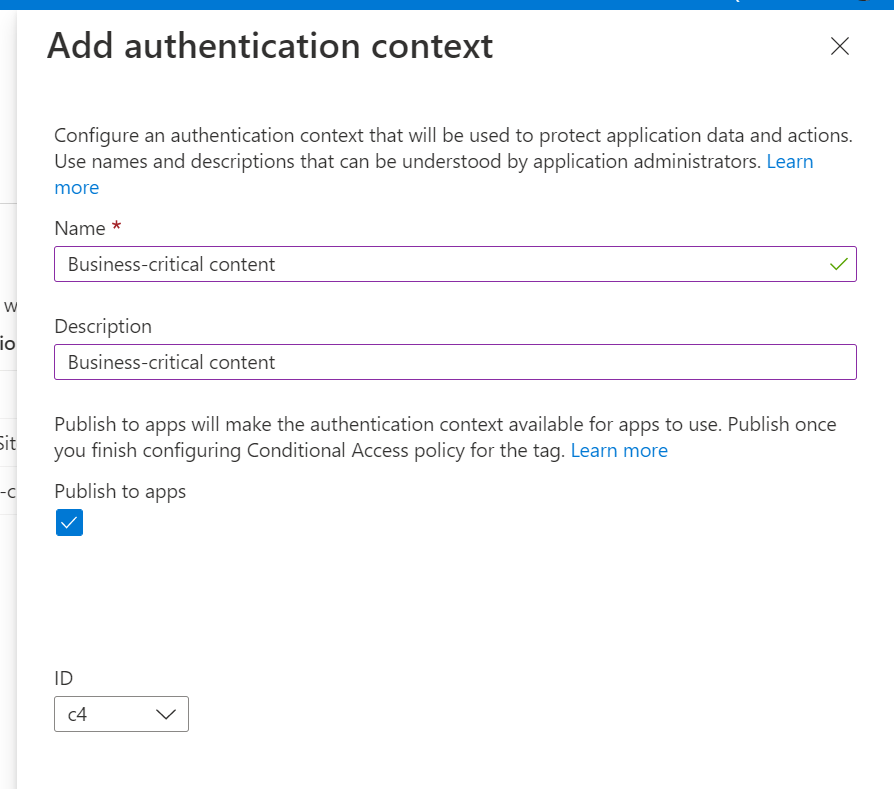
For this scenario, let’s create a new authentication context called Business-critical content. ID is a tag for the context, in total there can be 25 contexts.
Learn more about authentication contexts: https://learn.microsoft.com/en-us/azure/active-directory/conditional-access/concept-conditional-access-cloud-apps#authentication-context-preview
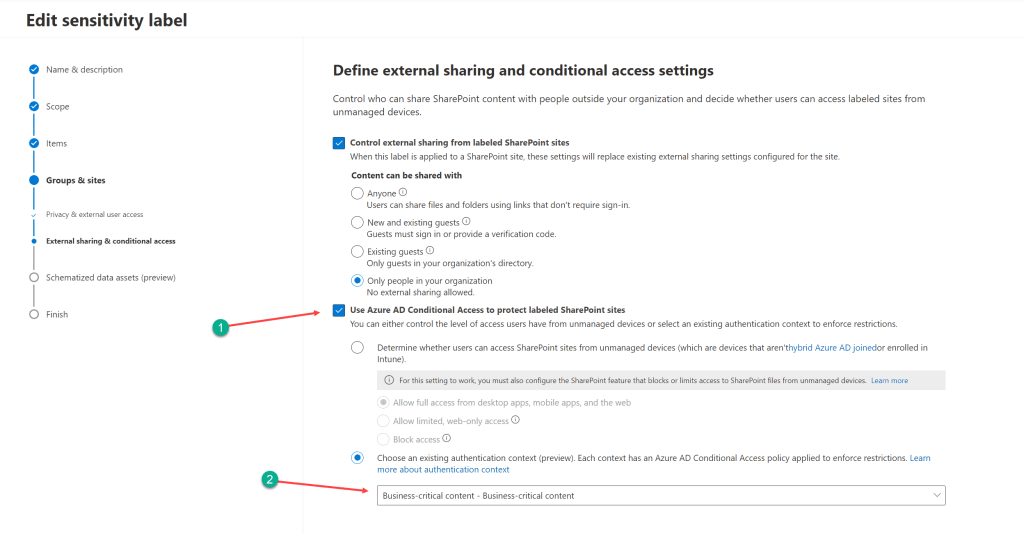
Step 3: Apply Authentication Context to Sensitivity Label
Implementation and deployment of sensitivity labels are pre-requirements for this next step. For this scenario, a label called Highly Confidential is already created and configured to label teams and sites. To set up authentication context enable Use Azure AD Conditional Access to protect labeled SharePoint sites, enable Choose an existing authentication context (preview) and select previously created Business-critical content context.
Step 4: Create a Conditional Access Policy for Business-critical Access Control
The last configuration needed, is to create a conditional access policy, which uses authentication context to control access. First, open Cloud apps and actions blade, select Authentication context for what this policy applies and select Business-critical content as the context.

On Grant settings, enable Require authentication strength (Preview) and select previously created Business-critical content strength.
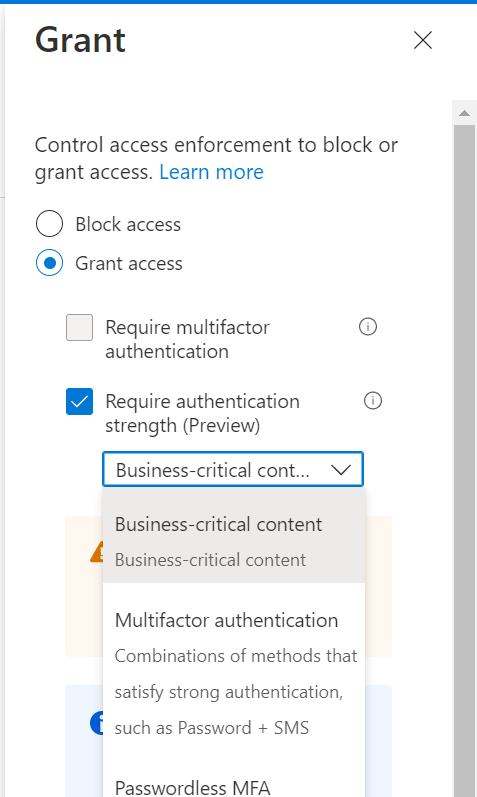
Also, apply other conditional access settings based on the organization’s policies.
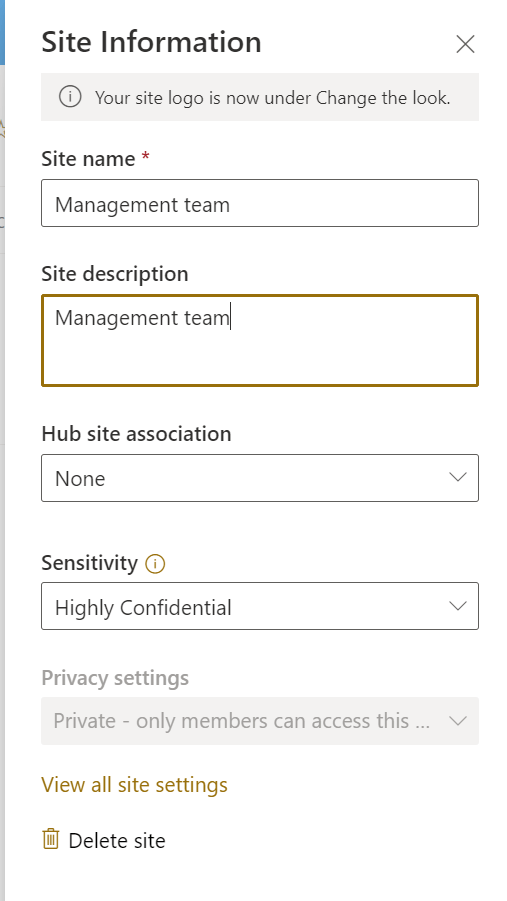
Step 5: Apply a Label to a Site
Label can be applied to a site from Site Information pane or editing a team. In this case Highly Confidential label applies authentication context to the site.
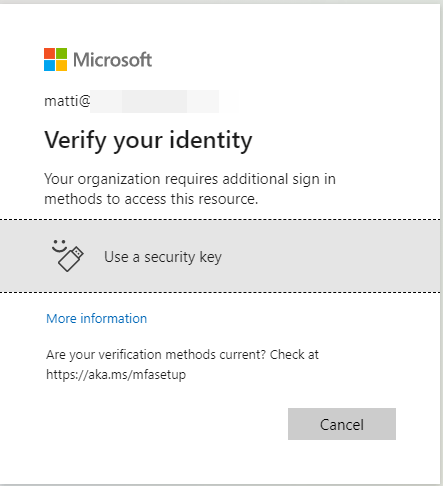
Now access to site requires strong authentication with a FIDO2 security key.
Experience for users
When users open the labeled site or open Files tab in labeled team, they are asked to authenticate with a security key. If user has already signed in with a key, access is granted without notification.
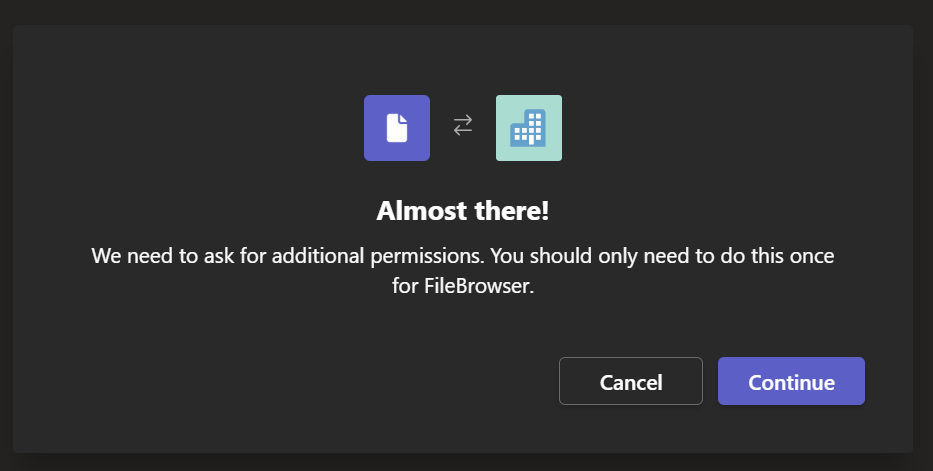
In Microsoft Teams files tab, user is getting a notification about the permission. When user click Continue, security key is asked.
And in Office desktop apps user experience is like in the image below.

Afterword
Authentication strength settings give organizations more granular control over strong authentication methods in different apps, content, and different user roles. Since some strong authentication methods are more vulnerable to phishing, like phone calls compared to Microsoft Authenticator, it’s important to secure the most sensitive assets and information.
The configuration itself is fairly simple and straightforward. When applying only a single strong authentication method, it’s really important to deploy the authentication method for target users, in this case deploying FIDO2 keys. Users also need to understand the implications of applying a sensitivity label. In this case, users may lock themselves out, if they don’t have a FIDO2 key. It might be better to scope the label for a limited group of users. Altogether, communications about the change and training of the end users are important.
Discover more from Enabling the Future of Work with Matti
Subscribe to get the latest posts sent to your email.
